Wednesday, April 27, 2011

Jaden's Chinese Beef Broccoli

I found this on the Pioneer Woman site. Yes I look on there oh too often, but I find some really good recipes that my family has really loved!

She found this in a new cookbook called The Steamy Kitchen. She raves about it, but I haven't seen it before. I did look on Amazon and got a sneak peek. She has all sorts of info on Chinese spices, marinades, etc. that was really good info to read. Maybe it might be worth it??

This was a really good, quick meal that my family all enjoyed. The flavors were good and it is always nice when your main course includes your veggie!

Chinese Beef Broccoli
(The Steamy Kitchen Cookbook)
1 lb top sirloin or flank steak, thinly sliced into 1/8 in. thick strips (I used a London Broil)

1 1/2 lbs broccoli, cut into bite sized florets (I used about 3 stalks)

1 tbsp cooking oil

1 tbsp minced garlic (I like garlic and didn't measure this. I used 5-6 cloves)

BEEF MARINADE

1 1/2 tsp soy sauce
1 tsp corn starch
1/2 tsp cooking oil
black pepper to season beef
(I doubled this marinade)

STIR-FRY SAUCE
3 tbsp oyster sauce
2 tsp Chinese rice wine or dry sherry ~ (I substituted apple juice here)
2 tsp Chinese black vinegar or balsamic vinegar


DIRECTIONS
In a bowl, combine the ingredients for Beef Marinade. Add the beef and let marinate for 10 minutes at room temp. (I actually marinated mine for 1 hour in the refrigerator)

In a small bowl, mix together the ingredients for the Stir-Fry sauce.

In a wok or large saute pan, bring to a boil about 1 inch of water. Add the broccoli and cover. Steam for about 3 minutes or until you can pierce the stem with a fork. Your broccoli should still be crisp, tender and bright green.

When broccoli is done, drain and let sit. Dry the pan and set it over high heat. When hot add 1 tbsp cooking oil and swirl to coat the pan. Add your minced garlic and fry for about 15-30 seconds. The garlic should be fragrant when done. This happens quick, so have your meat ready to add.
Add the steak strips, keeping them in one layer and fry for about 30 seconds and then flip over for another 30 seconds.

Pour in the stir fry sauce and stir to combine. Simmer until the sauce is thick-which happens pretty fast. Add your broccoli and toss to coat.

Eat with rice and enjoy!

Tuesday, April 26, 2011

Easy Tostadas

I found this idea in my All You magazine. They made it a little different, I made it more like tacos. I think the possibilities are endless and what was great was that it was easy and quick. I was looking for a quick meal with Baseball and T-ball practice starting.


It was quick and easy and my family really liked it!


Easy Tostadas


(altered from recipe found in All You magazine)


  • Corn Tortillas


  • 1 15 oz can of black beans, drained and rinsed


  • Ground Beef (as much as you need for your family, I used 1 lb)


  • Taco seasoning.


  • Salsa


  • lettuce


  • Sour cream


  • Avocado, sliced


  • Grated cheddar cheese


Preheat your oven to 350 degrees. Arrange corn tortillas (as many as will fit on a cookie sheet in a single layer ~ I got about 6 on mine) on a cookie sheet and then spray them with non-stick spray. Then sprinkle with salt. Bake until beginning to crisp, about 5-7 minutes. (The 2nd time I made this with the leftovers, we just fried the tortillas in a little oil on the stove and then did the remaining steps. Quicker and just as good, but not as healthy!)


Meanwhile, cook your ground beef. When done, drain the grease and add taco seasoning to your liking. (This part can be done in advance. Have your meat already cooked and ready to add to your shells in the morning)


When your tortillas are done, set your oven to Broil. Next put your meat on your tortillas, then black beans, salsa and cheese. This is where you can add what your family likes. Broil your tostadas until the cheese is melted and everything is heated through ~ about 1-2 minutes.


Now top with lettuce, avocado, sour cream and enjoy! I ate mine like a tostada. The boys folded theirs in half and ate like a taco!

Friday, April 15, 2011

Simple Sesame Noodles

We like the restaurant Hu Hot! I think the flavors they use in there sauces and all the vegies you can add to your noodles!

We are trying to do a little Hu Hot at our house!

I found this recipe and decided here was a beginning. You don't cook it up on a skillet, but I think next time I will add vegies to the sauce and cook them up on a skillet with some meat!

The flavors are good and I loved the easiness of this!

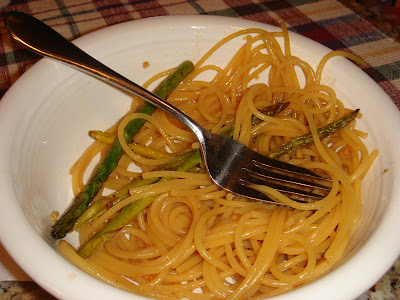
Zach even added some of the Garlic-Balsamic Asparagus to his noodles! Simple Sesame Noodles (www.thepioneerwoman.com)


  • 12 ounces thin noodles, cooked and drained


  • 1/4 cup soy sauce


  • 2 tbsp sugar


  • 4 cloves garlic, minced


  • 2 tbsp rice vinegar


  • 3 tbsp pure sesame oil


  • 1/2 tsp hot chili oil ( I couldn't find this exact name, but used Mongolian Fire Oil from Blairs) ~ don't be nervous was NOT too spicy!


  • 4 tbsp canola oil


  • 2 tbsp hot water


  • 4 whole green onions, sliced thin (forgot to buy these!)

Whisk all the ingredients (except noodles and green onions) together in a bowl. Cook some yummy vegies in some of the sauce if desired!


Pour sauce over warm noodles and toss to coat.


Sprinkle with green onions and serve it up!

Thursday, April 14, 2011

Garlic-Balsamic Asparagus

I love asparagus! I have usually just steamed it and eaten it just plain or with a little salt and pepper!

I saw this recipe and decided, why not give it a try!

I was glad I did! It was very easy and really really yummy!

I found it in my new Our Best Bites cookbook, which I recommend to anyone!

I cooked it in my oven, but you can also grill it on your barbeque too!

Garlic-Balsamic Asparagus

(Our Best Bites cookbook


1 lb asparagus (or whatever you have on hand or want to serve)

1/2 tsp kosher salt (I used sea salt)

1/4 tsp pepper

1 tbsp olive oil

1 tbsp balsamic vinegar

1 tsp minced garlic (I used 2 cloves, minced)


  1. Preheat oven to 425 degrees


  2. Wash asparagus and then snap the woody ends off the bottom of each stem.


  3. In a small bowl, combine the salt, pepper, olive oil, vinegar and garlic. Drizzle over asparagus in a small container and then toss to coat.


  4. Line a baking sheet with aluminum foil and then spray the foil with non-stick cooking spray. Arrange the asparagus in a single layer on the baking sheet. Drizzle any remaining oil and vinegar mixture on top.


  5. Roast for 10 minutes, turning about half way through!

Enjoy a new an easy way to eat asparagus!

Wednesday, April 13, 2011

Soap Dispensers

I did a little kitchen crafting this last weekend and thought I would share!

I originally had this dispenser used for my olive oil. Then I read all about how olive oil needs to be stored in the dark and that it can go bad not sealed etc.

So I removed my olive oil and put dish soap in it! I had seen this at a friends a long time ago and thought it looked much better than the dish soap container on the counter. Also, the soap comes out slow so you never use too much!

I saw this idea on a blog and I can't remember where now! I decided to try it out in order to get some of those ugly hand soap containers out of my bathroom!

I thought it turned out pretty good and it would work for any soap dispenser you have in your house! I got a mason jar and lid first. I used a heavy duty nail and just hammered a hole the same size as my soap pump. (I used the pump from my ugly store bought bottle!) Once you can get your pump inside the hole stick it in and make sure it reaches the bottom. I had to cut a little off my pump. I then hot glued the lid to the ring of my jar and tied a little bow around it! Fill it with soap and you are done! You could decorate your jar many different ways, I just had some ribbon nearby and used that!

Thursday, April 7, 2011

Spicy Dr. Pepper Shredded Pork

Here is the picture finally!

Yummy!!

I have a picture of this wonderful yummy scrumptious pork, but my computer is being temperamental and wont let me download it!

I couldn't wait any longer to share, so you get it without picture (but go to http://www.thepioneerwoman.com/ and you can find her picture!).

It is only shredded pork and we have all seen shredded pork, but I have not had pork like this before!

It is tender and yummy and has a slight spice from the Chipotle peppers, which I have discovered that I truly love these peppers!!

My kids ate this fine, it was a little spicy for them, but oh so good! I ate the rest of the left overs today for lunch! In fact I thought about eating lunch at about 10 I wanted to eat this pork! So try it out and hopefully it isn't too spicy for your family!

________________________

Spicy Dr. Pepper Shredded Pork

(The Pioneer Woman)


  • 1 whole large onion


  • 1 whole pork shoulder (pork butt) roast - 5-7 lbs.


  • salt and pepper


  • 1 can (11 ounce) Chipotle peppers in Adobo sauce


  • 2 cans Dr. Pepper (I bought a bottle, like the ones at the convenience store! It was a little less than 2 cans, but I didn't want to buy a case)


  • 2 tbsp brown sugar

Preheat oven to 300 degrees.


Peel and cut the onion into wedges. Lay them in the bottom of a large dutch oven or roasting pan. I sprayed my pan with non-stick spray and clean up was a breeze!


Generously salt and pepper your roast. Set it on top of your onions. Pour the can of Chipotle peppers and the sauce all over the top of the roast. Pour in the Dr. Pepper. Add the brown sugar and mix with the juice. (I put a little Dr. Pepper in a cup and mixed in the brown sugar and then poured in the pan.)


Place lid on pot and set in oven. Cook for at least 6 hours, turning the roast over 2-3 times during cooking. Check meat after 6 hours; it should be falling apart. If not falling apart, return to oven for another hour.


Remove meat from pot when done and shred. Discard any fat. Strain off as much fat from the liquid in your pan and then place the shredded meat back in the pan. Keep warm until ready to serve. I was concerned about it being too spicy, so I put my shredded meat in another oven proof dish and poured some liquid into the dish to cover.


Serve on warm flour or corn tortillas with lettuce, cheese, sour cream, tomatoes, avocado, etc. Also good as nachos with tortilla chips! Mixing the meat with the lettuce, cheese, etc. helps the spiciness too!

Tuesday, April 5, 2011

Sweet Cinnamon Scones

This is yet another one of Pioneer Woman's yummy recipes!

They are light and cinnamony~light not on the terms of calories, but on the terms of yummy soft texture and full of cinnamon chips and sweetness!

They take a little time putting together~just the part where you form the dough and make the actual scone. It was sticky (next time I will flour my counter) and then I think I crammed too many on the cookie sheet and I will use 2 sheets next time! I had a really hard time getting them out of the pan without breaking them!

Definitely a great brunch or holiday make, not (at least for me) an everyday make!

I will definitely not shy away from making scones again though! So good!!

Sweet Cinnamon Scones

(The Pioneer Woman)


  • 3 cups flour


  • 1/3 cups sugar


  • 5 tsp baking powder


  • 1/2 tsp cinnamon


  • 2 sticks (1 cup) butter


  • 3/4 cups heavy cream


  • 1 egg


  • 1 tsp vanilla extract


  • 1 cup cinnamon chips

Topping:


  • 1/2 cups sugar


  • 1 tsp cinnamon


  • 1 1/2 tsp heavy cream

Preheat oven to 350 degrees.


In a large bowl, mix flour, 1/3 cup sugar, 1/2 tsp cinnamon, and baking powder. Cut butter into pieces and then cut the butter into the dry ingredients (use a pastry blender or fork to incorporate the butter until it resembles coarse crumbs).


Stir in cinnamon chips.


Mix together in a separate bowl cream, egg and vanilla extract. Pour into flour/butter mixture, stirring gently with a fork to combine.


Turn onto a work surface~mixture will be crumbly and sticky at the same time. Gently press together on the sides as you flatten or can roll with a rolling pin. From either a circle or rectangle.


Mix together topping ingredients and sprinkle over dough. Cut into wedges or triangles and transfer to a cookie sheet (or 2) and bake for 20-25 minutes.


Allow to cool before serving!

Monday, April 4, 2011

Apple Streusel Bars

This is an excellent recipe for those of us who don't make apple pie because the crust scares us! Whenever my mom visits, we always have some sort of pie because she is awesome at making crusts!! Me~not so much!

This recipe was very good and came together very good!

I do have some changes I will make for next time I make these!

1. I will use vanilla extract in the glaze instead of almond. My family wasn't too thrilled about the almond taste.

2. I will probably try this next time without the glaze. I thought the bars would be less sweet and still really good without the glaze!

I used my canned apple pie filling for this recipe, so I don't know about what the filling tastes like, but I bet it is just as good as the whole recipe turned out!

Apple Streusel Bars

(Our Best Bites cookbook, which I would recommend to anyone!)

Sweet Pastry


  • 2 cups flour


  • 1/2 cup sugar


  • 1/2 tsp salt


  • 1/2 tsp baking powder


  • 1 cup real butter (and it says NO substitutions!)


  • 1 egg, beaten

Apple Filling


  • 1/4 cup flour


  • 1/2 cup sugar


  • 1 tsp cinnamon


  • 4 cups (about 3 medium) sliced, peeled baking apples ~ Granny Smith or Gala is recommended

Glaze


  • 2 cups powdered sugar


  • 1 tsp almond extract (or my recommendation vanilla)


  • about 3 tbsp milk, whole milk ~ I used 1% which is what I have on hand!

To make the pastry, mix flour, sugar, salt, and baking powder in a medium bowl. (Make sure the bowl is big enough so when you cut in the butter the mixture wont spill out of the bowl.) Cut in butter with a pastry blender or fork until you have pea sized crumbles. (I found it easiest to cut the butter into smaller "pats" and I added 1 cube at a time. I also in the end, with clean hands ran through the mixture and broke apart any remaining large pieces because my arm was getting TIRED!) Gently mix in beaten egg.


Spray a 9 x 13 baking dish with cooking spray. Gently pat about 2/3 of pastry mixture onto the bottom of your dish and set aside. Preheat oven now to 350 degrees.


Now comes the filling. If you are like me and have canned apple pie filling go ahead and pour that all over your pastry crust. If not, do some apple pie filling this year and that will make this a cinch next time!!!


To prepare the filling, combine flour, sugar and cinnamon. Toss with your cut up apples and evenly coat. Spread onto your pastry crust. Sprinkle your reserved pastry mixture over the top of your apples.


Bake at 350 for 40 minutes. When finished, allow to cool completely. (I looked for my crust to start lightly browning before I took it out!)


To prepare glaze, whisk together powdered sugar, almond (or vanilla) extract and enough milk to reach desired consistency.


Drizzle over cooled bars. The book recommended putting in a zip lock bag and cutting a whole in the corner and drizzling this way. I just grabbed a spoon and started letting the glaze drizzle over the edge of it.


Allow the glaze to harden and then cut into bars and enjoy!!