Showing posts with label Desserts. Show all posts

Wednesday, March 21, 2012

Turnovers

Todd and I decided one night to experiment and make something new!
I had traveled with him on a charter to Jackson Hole where we ate an apple turnover at the Bunnery.  We love to go to the Bunnery.
We had fun making these, but they are time consuming and many, many, steps.  If you want the recipe we found it in the King Arthur Cook book.  I will tell you, there are many steps. 
We didn't quite master the light flakiness of the one we ate at the Bunnery, but they were pretty good.
We just might have to try and make them again, another day!

Friday, March 16, 2012

Cherry Crunch

This is just an easy, nothing too exciting, ingredients on hand, fruity dessert!  It was yummy and just a simple no chocolate dessert!
You can make it with any pie filling you crave and it reminds me alot of a dutch oven dessert!
I will say put the nuts in, they add great flavor and a great crunch!
Cherry Crunch
  • 1 cube (1/2 cup) butter (room temp)
  • 1 pkg white or yellow cake mix (dry)
  • 2 cans cherry, blueberry, peach, mixed berry, or your fav. pie filling (or you can make a mix of two different kinds)
  • 1/2 cup chopped walnuts or pecans or almonds
Grease a 9 x 13 pan.

Cut 1 stick of butter (with a pastry blender or fork) into 1 pkg dry cake mix until crumbly. 

Pat 1/2 of the cake mix mixture into your 9 x 13 pan.  Reserve the other half for the topping and put aside.

Spread the 2 cans of pie filling over the crumb mixture.

Blend in your nuts into the reserved cake mix.  Crumble the cake mixture no top of the pie filling.  Squeeze small portions into pea size chunks and sprinkle all over.

Bake for 45 minutes at 350 degrees, or until golden brown on the top and bottom.  Make sure the bottom is golden brown too!  My oven actually took longer than 45 minutes, but keep an eye on it so you don't burn!

Serve warm with whipped cream or ice cream!

Tuesday, March 13, 2012

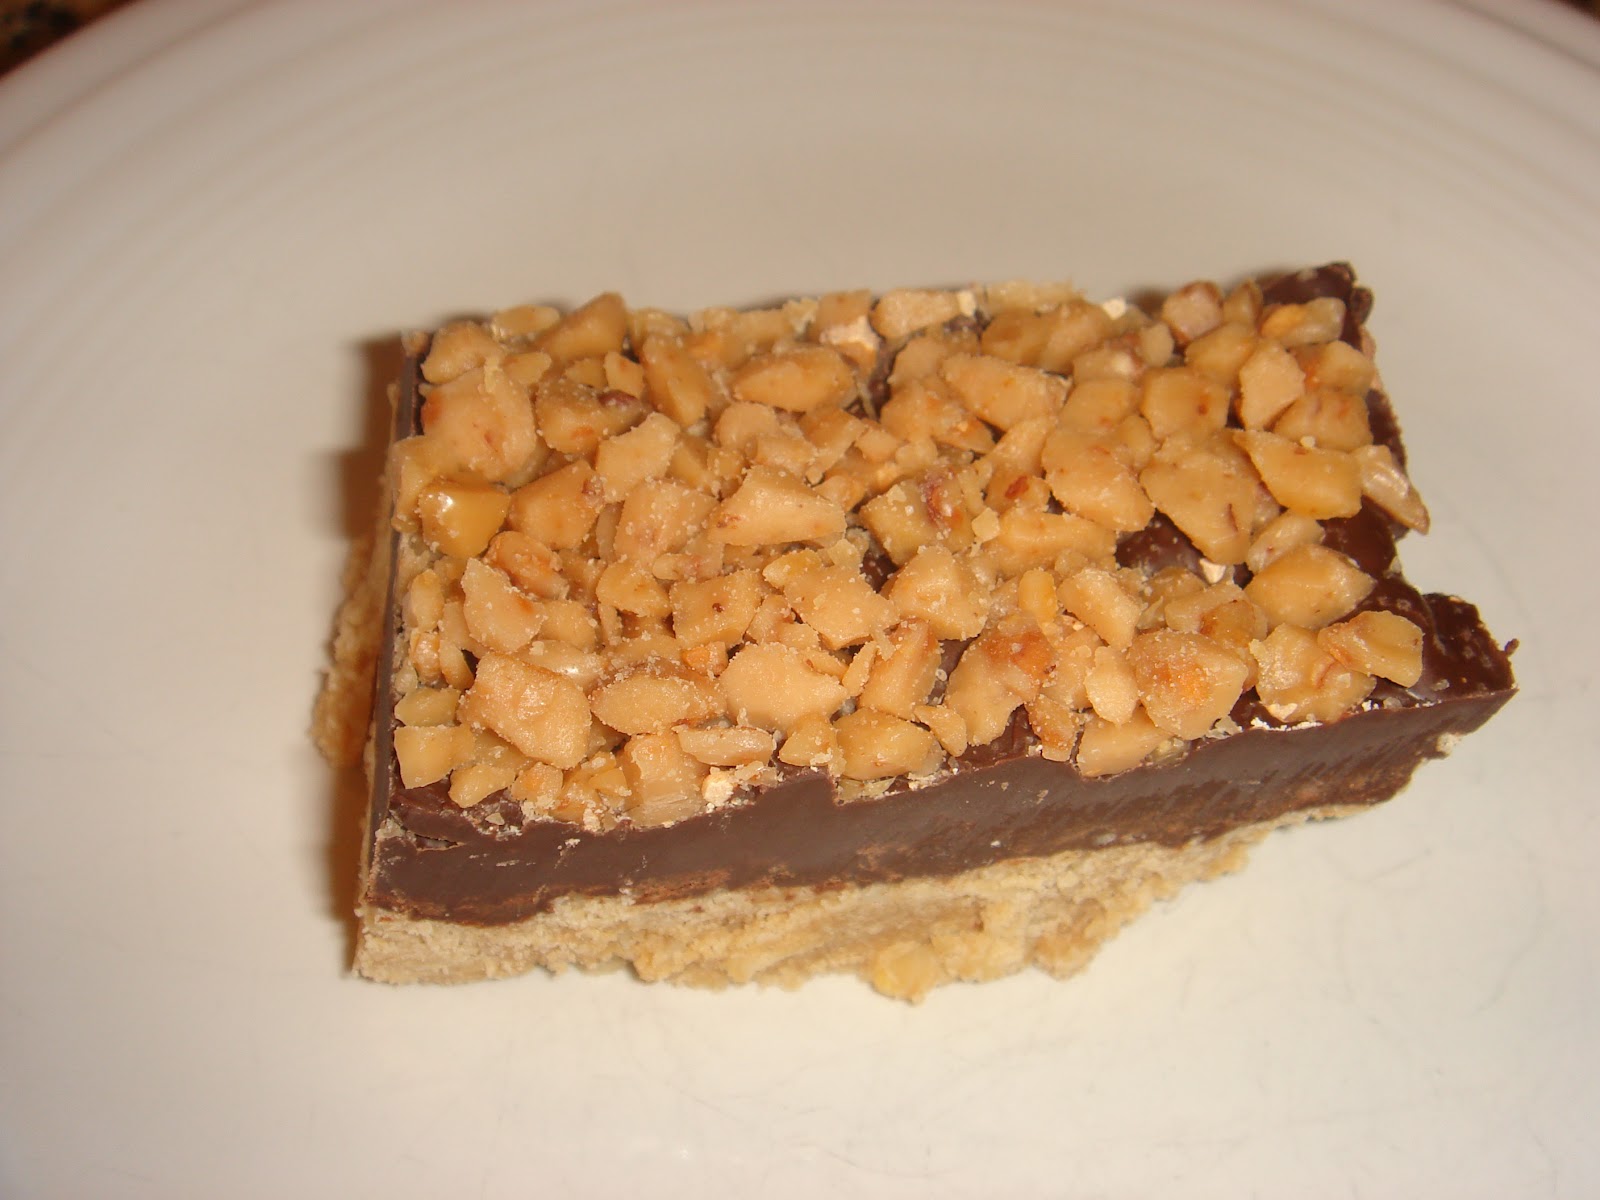
Oatmeal Peanut Butter Chocolate Toffee Bars

Yes this recipe name is a mouth full and yes the bars are a yummy mouthful!
These were really good and a hit with everyone. 
Oatmeal Peanut Butter Chocolate Toffee Bars
  • 1/2 cup butter, at room temp
  • 1/2 cup peanut butter
  • 3/4 cup packed brown sugar
  • 1 large egg yolk
  • 1 1/2 cups flour (start with 1 1/4 cup maybe, thought I might have had too much flour)
  • 1/2 cup oats
  • 1/4 tsp salt
  • 3 cups chocolate pieces
  • 1 cup toffee baking pieces
Heat oven to 350.  Line a 9 x 13 pan with foil so that the ends extend over the edge of the pan.  Spray your foil.  This makes clean up easy and makes cutting them into bars so much easier too!

In your mixer, beat the butter, peanut butter, sugar and egg yolk.  Beat until smooth and creamy, about 2 minutes making sure to scrape down the sides of the bowl as you go.

Add the flour (make sure not to add to much!), oats, and salt and beat on low speed until ingredients are just blended, about 30 seconds or so.

Press this mixture evenly in your foil covered 9 x 13 pan.  Bake the crust until golden brown, 15-20 minutes.  Be careful not to overbake.  This part was a little hard to tell because my mixture was a light brown color to start with because of the peanut butter.  Just watch closely!

Remove the pan from the oven and sprinkle the chocolate chips evenly across your crust.  Return the pan to the oven for  1 minute to start melting the chocolate.  Take out of the oven and use an offset spatula and smooth out the chocolate and spread evenly.

Sprinkle the toffee chips over the chocolate.  Gently press the toffee pieces into the chocolate so they wont fall off!  I was a little too gentle and my bars were a little messy with toffee bits falling off!

Set the pan on a wire rack to cool and set up for about 2 hours.  I ended up putting my in the refrigerator after a while to help set the chocolate up.

Use your foil edges to lift the bars out of the pan and cut into squares.  For any leftovers, store in a container in the refrigerator!

Friday, February 10, 2012

S'mores Rice Krispies Treats

 This was a yummy pinterest find!
There is nothing simpler to me than rice krispies!  I love almost nothing more than s'mores!  So why not combine!!
These were a great treat!  I think these could be done almost 2 ways!
  1. Original Recipe way
  2. Make without the marshmallow tops
Any way you try it, they were an easy way to have s'mores in the winter when you can't go outside and roast a marshmallow the real way!
S'mores Rice Krispies Treats
(recipe by Glorious Treats)
  • 3 tbsp butter, cut into pieces
  • 4 cups mini marshmallows (or about 40 regular/large marshmallows)
  • 5 cups Rice Krispies cereal
  • 1 cup Golden Grahams cereal
  • 1/2 cup mini chocolate chips
Top Layer
  • 1 cup semi-sweet chocolate chips
  • 10 full sized graham crackers, broken in half
  • 40 large marshmallows
Butter or lightly spray a 9 x 13 pan.

In a large bowl, place your rice krispies and golden grahams cereals.  Set aside.

In a large microwave safe bowl, place your butter and 4 cups mini marshmallows.  Microwave for about 3 minutes, stirring after 2 minutes.  Watch carefully depending on bowl size.  My bowl must not have been large enough because the marshmallows started overflowing after about 1 1/2 minutes.

Cook until marshmallows and butter are melted.  Now pour over your cereals and mix gently to combine.  Use a utensil that is sprayed with cooking spray.

Add your mini chocolate chips and then pour mixture into your prepared 9 x 13 pan.  Press into pan.

Melt your semi-sweet chocolate chips in microwave or use a double boiler.  Heat until melted and then pour over top of rice krispie treats and spread with a spatula.

While the chocolate is still warm, spread your graham crackers on top.  I broke my grahams in half and then in half again to make smaller treats!  They were a better size for me and my family!  I didn't use all 10 grahams.  My 9 x 13 pan must be a little different than the original or I just spaced mine apart more.

Put pan into fridge to set, about 10-15 minutes.  Once set, cut into squares (or in my case small rectangles).  Use the lines of your grahams as a guide.  Place on a large baking sheet.

Next you will cut in half your 40 marshmallows, or how many you need to top each graham.  If you have squares, you will need 2 large mallows per square cut in half.  If you made rectangles, you will need 1 large mallow per rectangle.  Get it???

I used kitchen scissors to cut my mallows.  Place each half on the top of each graham (as pictures above).  Now you can toast your mallows.  This is where I think next time I will either not do the mallows, or do them individually as ready to eat.  My mallows didn't stick and fell off after toasting and then the leftover mallows got kind of firm!  You can decide.

When you toast, stick in the oven on broil and don't let yourself get distracted or else they will burn quicker than you think!  Or if you are lucky and have a kitchen torch, you can use that!

Now enjoy your indoor smores!

Monday, December 5, 2011

Peanut Butter Cup Brownies

I found this recipe on Pinterest.  Did I tell you how much I like that site??
This recipe was adapted from Nestle's Very Best Baking.  The recipe originally has you make them in regular muffin cups.  The recipe was changed for mini muffin cups!  They are perfect mini size!
Anyone who loves chocolate and peanut butter will love these! 
Isn't anything mini that much better too???
Peanut Butter Cup Brownies
(found on pinterest, adapted from Nestle's Very Best Baking)

  • 1 box of your favorite brownie mix or mix up a batch of your favorite homemade version
  • 1/2 cup peanut butter chips
  • 1/2 cup semi-sweet chocolate chips
  • 3/4 cup creamy peanut butter
Preheat your oven to 350 degrees.

Prepare your brownies as directed.  The original recipe doesn't use paper liners, but I used them and think they make using the mini muffin cups so much easier to get out.  So either spray really good or line with paper liners.

Spoon batter evenly into your mini muffin cups (about 1 heaping tsp.)  Bake for 13-15 minutes.  I must have filled mine more than she did because my cooking time was about 3-5 minutes more.  Either way, cook until a toothpick inserted comes out slightly wet, but done.

After brownies are out of the oven, wait for centers to fall.  This will happen while cooling, or you can tap the centers with a tsp. to help make a well shape in your brownie.

Place peanut butter in a microwave safe bowl and microwave for about 30-45 seconds.  While brownies are still warm, spoon about 1/2 tsp of peanut butter into the center of each brownie.  Top with semi-sweet and peanut butter chips.  Cool and gobble up!

Friday, July 29, 2011

White (or Semi Sweet) Chocolate S'mores Gooey Cake Bars

Wow, what a title!!  I found this on the Picky Palate.  It originally calls for white chocolate chips, but I didn't have any.  So figuring on these were S'mores, I substituted semi-sweet chocolate chips.  Next time I make these I might just use hershey bars!
They were really good, but a little goes a long way!  You make these in a 8x8 pan, and get 12-16 servings.  They are yummy, but you don't need much!
Super good treat, especially if you are a S'more lover!!
White (or Semi-sweet) Chocolate S'mores Gooey Cake Bars

  • 1 box yellow cake mix
  • 1 egg
  • 1 stick (1/2 cup) butter, softened
  • 4 1/2 full graham crackers
  • 10 ounce bag of chocolate chips~white or semi-sweet or use chocolate bars
  • 2 cups mini marshmallows
  • 1/2 cup sweetened condensed milk
Preheat oven to 350 degrees.  Line an 8 x 8 inch baking pan with foil.  Make sure to overlap the edges.  Double wrap the foil so you have overlapping edges on each side.  Generously spray the foil with cooking spray!

Place cake mix, egg, and butter in a mixing bowl.  Combine until a nice dough forms.  It will be a little sticky, similar to a cookie dough.

Press half of the dough in your pan and press evenly.  Place your graham crackers on top.  Now layer your chocolate chips and then put your mini marshmallows on top.

Now top with your remaining dough, trying to cover your whole pan.  I took pieces of dough and flattened it in my hand and then placed on top.  It was easier this way and seemed to be able to cover the marshmallows better.  Drizzle the sweetened condensed milk over the top.

Bake for 28-33 minutes, or until cooked through and golden brown on top.

Remove from oven and let sit for about 5 minutes.  After 5 minutes, take a plastic knife and run it along the edges to loosen it off the foil.  This little trick will make it so much easier to remove when it is cooled.

Let cool completely in the pan.  When cool, use the foil edges and pull the bars out of the pan.  Cut off all the edges.  This will make your bars able to be made into little squares.  Save your edges to snack on!!  Cut your bars into squares and serve!  Enjoy at room temp or even great chilled!!

Wednesday, July 27, 2011

Rhubarb Cobbler

I found this recipe on The Pioneer Woman and decided I just might need a rhubarb plant after all!  This was a great summer dessert and had great flavor!  It was easy to make and yummy with vanilla ice cream or whipped cream!  I do think next time I will chop up my rhubarb in bigger chunks and also not use all the dough.  I had lots of dough and piled it on, but it ended up not getting all the way done on the bottom of the layer!  I also might add more rhubarb next time too!  Definitely a keeper and a summer treat!!

Rhubarb Cobbler
(The Pioneer Woman)
  • 4 cups chopped rhubarb (or maybe more!!)
  • 1 1/2 cups sugar
  • 1/4 tsp salt
  • 2 tbsp lemon juice
  • 1/2 tsp almond extract (optional, but I added this)
  • 2 cups flour
  • 2 tbsp sugar
  • 1/4 tsp salt
  • 1 tbsp baking powder
  • 1/4 cup shortening (Crisco)
  • 1/4 cup butter
  • 1/2 cup whole milk (I used what I had on hand~1%)
  • 1 egg
Preheat oven to 400 degrees.

In a bowl, combine chopped rhubarb, sugar, 1/4 tsp salt, lemon juice, and almond extract.  Stir and set aside.

In a separate bowl, combine flour, 2 tbsp sugar, 1/4 tsp salt, and baking powder.  Stir together and then add the shortening and butter.  Cut together with a pastry cutter or you could use a fork also.

Beat egg and milk together.  Pour into flour mixture and stir together with a fork until combined.

Pour rhubarb into a greased baking dish (I used a pie plate).  Make sure to get all the juices out of the bowl!  Tear off pinches of the dough and drop it onto the surface of the fruit, creating a cobbler texture.  Sprinkle additional sugar over the top.  Bake for 30-35 minutes or until golden brown and bubbly.

Serve warm with ice cream or whipped cream!  It is also good cold the next day!!

Wednesday, June 1, 2011

Strawberry Sauce

I know it has been a while since I have posted anything!  We have been busy with baseball and end of the school year stuff and I haven't been very experimental or cooking a ton!
Well, I am back at it again and hoping to be cooking more now that I am not trying to rush kids to bed and going to activities etc.!
This sauce turned out really good (just need to adjust the sugar depending on the sweetness of your strawberries) and we ate it on crepes! 
Strawberry Sauce
(Our Best Bites cookbook)
  • 1 pint strawberries, washed, hulled, and roughly chopped ~ I googled what a pint of strawberries was since I bought mine at Costco and it is 2 1/4 cups sliced or 7 cups whole berries
  • 1/3 cup granulated sugar ~ adjust to sweetness, mine needed more sugar
  • 1 tsp almond or vanilla extract ~ used vanilla
Combine berries, sugar, and vanilla(or almond) extract in a medium saucepan and bring to a simmer over medium heat.  Cook for 5 minutes, stirring constantly and breaking up the strawberries with a wooden spoon.

After 5 minutes, remove from heat and allow to cool before putting in your blender.  When cool enough, transfer to your blender and blend until desired consistency is reached.  Refrigerate unused sauce for up to 1 week or freeze for up to 3 months!

Use on top of waffles, crepes, ice cream, milkshakes or even the cookbook suggests adding a few spoonfuls to lemonade to make Strawberry lemonade!  A yummy summer treat!!

Tuesday, April 5, 2011

Sweet Cinnamon Scones

This is yet another one of Pioneer Woman's yummy recipes!

They are light and cinnamony~light not on the terms of calories, but on the terms of yummy soft texture and full of cinnamon chips and sweetness!

They take a little time putting together~just the part where you form the dough and make the actual scone. It was sticky (next time I will flour my counter) and then I think I crammed too many on the cookie sheet and I will use 2 sheets next time! I had a really hard time getting them out of the pan without breaking them!

Definitely a great brunch or holiday make, not (at least for me) an everyday make!

I will definitely not shy away from making scones again though! So good!!

Sweet Cinnamon Scones

(The Pioneer Woman)


  • 3 cups flour


  • 1/3 cups sugar


  • 5 tsp baking powder


  • 1/2 tsp cinnamon


  • 2 sticks (1 cup) butter


  • 3/4 cups heavy cream


  • 1 egg


  • 1 tsp vanilla extract


  • 1 cup cinnamon chips

Topping:


  • 1/2 cups sugar


  • 1 tsp cinnamon


  • 1 1/2 tsp heavy cream

Preheat oven to 350 degrees.


In a large bowl, mix flour, 1/3 cup sugar, 1/2 tsp cinnamon, and baking powder. Cut butter into pieces and then cut the butter into the dry ingredients (use a pastry blender or fork to incorporate the butter until it resembles coarse crumbs).


Stir in cinnamon chips.


Mix together in a separate bowl cream, egg and vanilla extract. Pour into flour/butter mixture, stirring gently with a fork to combine.


Turn onto a work surface~mixture will be crumbly and sticky at the same time. Gently press together on the sides as you flatten or can roll with a rolling pin. From either a circle or rectangle.


Mix together topping ingredients and sprinkle over dough. Cut into wedges or triangles and transfer to a cookie sheet (or 2) and bake for 20-25 minutes.


Allow to cool before serving!

Monday, April 4, 2011

Apple Streusel Bars

This is an excellent recipe for those of us who don't make apple pie because the crust scares us! Whenever my mom visits, we always have some sort of pie because she is awesome at making crusts!! Me~not so much!

This recipe was very good and came together very good!

I do have some changes I will make for next time I make these!

1. I will use vanilla extract in the glaze instead of almond. My family wasn't too thrilled about the almond taste.

2. I will probably try this next time without the glaze. I thought the bars would be less sweet and still really good without the glaze!

I used my canned apple pie filling for this recipe, so I don't know about what the filling tastes like, but I bet it is just as good as the whole recipe turned out!

Apple Streusel Bars

(Our Best Bites cookbook, which I would recommend to anyone!)

Sweet Pastry


  • 2 cups flour


  • 1/2 cup sugar


  • 1/2 tsp salt


  • 1/2 tsp baking powder


  • 1 cup real butter (and it says NO substitutions!)


  • 1 egg, beaten

Apple Filling


  • 1/4 cup flour


  • 1/2 cup sugar


  • 1 tsp cinnamon


  • 4 cups (about 3 medium) sliced, peeled baking apples ~ Granny Smith or Gala is recommended

Glaze


  • 2 cups powdered sugar


  • 1 tsp almond extract (or my recommendation vanilla)


  • about 3 tbsp milk, whole milk ~ I used 1% which is what I have on hand!

To make the pastry, mix flour, sugar, salt, and baking powder in a medium bowl. (Make sure the bowl is big enough so when you cut in the butter the mixture wont spill out of the bowl.) Cut in butter with a pastry blender or fork until you have pea sized crumbles. (I found it easiest to cut the butter into smaller "pats" and I added 1 cube at a time. I also in the end, with clean hands ran through the mixture and broke apart any remaining large pieces because my arm was getting TIRED!) Gently mix in beaten egg.


Spray a 9 x 13 baking dish with cooking spray. Gently pat about 2/3 of pastry mixture onto the bottom of your dish and set aside. Preheat oven now to 350 degrees.


Now comes the filling. If you are like me and have canned apple pie filling go ahead and pour that all over your pastry crust. If not, do some apple pie filling this year and that will make this a cinch next time!!!


To prepare the filling, combine flour, sugar and cinnamon. Toss with your cut up apples and evenly coat. Spread onto your pastry crust. Sprinkle your reserved pastry mixture over the top of your apples.


Bake at 350 for 40 minutes. When finished, allow to cool completely. (I looked for my crust to start lightly browning before I took it out!)


To prepare glaze, whisk together powdered sugar, almond (or vanilla) extract and enough milk to reach desired consistency.


Drizzle over cooled bars. The book recommended putting in a zip lock bag and cutting a whole in the corner and drizzling this way. I just grabbed a spoon and started letting the glaze drizzle over the edge of it.


Allow the glaze to harden and then cut into bars and enjoy!!

Friday, March 4, 2011

Caramel Cake

I found this yummy cake on Our Best Bites and it proved to be just as yummy as it sounded!
The cake was moist and the frosting was oh so delicious!
The recipe makes a lot of frosting, next time I may half the recipe.
This is a yummy alternative to the normal chocolate and vanilla frosting! Definitely one I will be adding to my frosting choice list!
Caramel Cake

CAKE:

  • 1 Duncan Hines yellow cake mix
  • 1 8 oz. container of sour cream
  • 1 cup oil
  • 3 eggs
  • 1 tsp butter flavoring (I didn't have this and it was fine without!)
  • 1 tsp vanilla extract
  • 1 tsp almond extract

FROSTING:

  • 1 cup butter
  • 2 cups firmly packed brown sugar
  • 1/4 cup + 2 tbsp whipping cream
  • 2 tsp vanilla extract
  • 3 3/4 cups powdered sugar
  • About 1 cup toasted, chopped pecans (I didn't have these, but would be really yummy!)

To make the cake, preheat the oven to 350 degrees. In a large bowl, combine the cake ingredients and beat on med-high for 3 minutes. Pour the batter into a 9 x 13 pan and bake according to the times on the cake mix box. When the cake is finished baking, remove from oven and allow to cool. While cooling, prepare frosting.

In a medium saucepan, melt the butter over medium heat. Add the brown sugar and, stirring constantly, bring the mixture to a boil. Carefully stir in the whipping cream and vanilla. The mixture will splatter because it is really hot, so be careful! Bring mixture back to a boil.

Remove from heat and allow to cool for about 30 minutes. Transfer the mixture to a large mixing bowl and sift in the powdered sugar. Beat on high for 2-3 minutes or until creamy and fluffy. Spread the icing over the cake and sprinkle with toasted chopped pecans!

Thursday, March 3, 2011

Meltaway Mint Brownies

Still no camera, but did make some awesome brownies!
They are simple if you want to use a box, or easy if you want to use your favorite brownie recipe and add peppermint patties! Yes my favorite of all time candy is York Peppermint patties!
This brownie was really good!
______________________
Meltaway Mint Brownies
(Betty Crocker Brownie Mix)
  • 1 box Betty Crocker Supreme chocolate chunk brownie mix, or your favorite brownie recipe
  • Ingredients for brownie mix or brownie recipe!
  • 1/2 cup quartered chocolate-covered peppermint patties
Heat oven to 350 degrees. Grease a 9 x 13 pan.
Make brownie batter and spread half of batter in pan. Sprinkle the peppermint patties in a single layer over batter. Spoon remaining batter over patties, spread gently to cover.
Bake 28-30 minutes or until toothpick inserted comes out clean.
Cool completley before cutting!

Friday, February 11, 2011

Valentine Chocolate Bark

This is a yummy easy Valentine treat! Or a treat for any day, just add different sprinkles or put none on at all!
Enjoy!

Valentine Chocolate Bark
  • 2 bags white chocolate chips ~ she used Ghiradelli, but I had Hersheys and they worked fine)
  • 2 bags semisweet chocolate chips ~ again Ghiradelli, but I had western family and it was fine again. I used 1 1/2 bags though!
  • 2 cups Rice Krispies ~ start with 2 cups, I ended up adding 3 1/2 cups Rice Krispies
  • conversation hears and sprinkles

Line a cookie sheet with parchment paper.

Place 3/4ths of the white chocolate chips in a glass or metal bowl. Place over a pan of simmering water and stir until melted. Remove from heat and stir in the remaining white chocolate chips until melted. ~ If the chocolate is too thick you can add 1 tbsp Crisco. (I didn't need to do this)

Stir in the Rice Krispies ~ It seemed like too much white chocolate, so this is when I started adding about 1/2 cup at a time until it seemed a better combination.

Spread onto the lined cookie sheet. Spread so thin, but that you can't see the pan. ~ an offset spatula works great.

Melt the semi-sweet chocolate chips using the same method as above. I used 1 1/2 bags here instead of 2 and it was plenty of chocolate for me! (You shouldn't need the Crisco here!)

Using an offset spatula, gently spread over the white chocolate.

Sprinkle on the conversation hears if wanted and sprinkles. Let set up until hardened. Break into pieces and enjoy!

Thursday, January 20, 2011

Warm Chocolate Puddings

I found this recipe in a Martha Stewart Everyday Food Magazine!
The recipe made 4 individual servings and they turned out really good!
I may have cooked them a little too long, make sure to not overcook and then the insides will be more pudding like! Might just be a nice Valentine Treat!
Warm Chocolate Puddings
(Martha Stewart Everyday Foods)
  • 4 ounces semisweet or bittersweet chocolate, finely chopped (I used semisweet chocolate chips)
  • 4 tbsp butter
  • 4 tbsp sugar
  • 2 large eggs, separated
  • 1/2 tsp vanilla
  • 1/4 tsp salt
  • Ice Cream or Whip Cream for on Top!

Preheat oven to 375 degrees. Place four 6-8 ounce ramekins or oven proof bowls on a baking sheet.

Place chocolate and butter in a medium heatproof bowl set over (not in) a saucepan of simmering water -a double boiler. Stir occasionally just until melted, 4-5 minutes. Remove from heat; mix in 2 tbsp sugar, then eggs yolks and vanilla.

In a medium bowl, with an electric mixer, beat egg whites and salt until soft peaks form. Still beating, gradually add remaining 2 tbsp sugar; beat until mixture is stiff and glossy.

Using a rubber spatula, mix about 1/3 egg white mixture into chocolate; gently fold in remaining egg-white mixture just until combined. Divide among bowls.

(Pudding can be prepared in advance up to this point; cover with plastic wrap; refrigerate up to 1 day!)

Bake until tops are puffed and cracked but insides are still quite soft (a toothpick inserted in center will come out gooey), 20-25 minutes or 25-30 minutes if refrigerated.

Serve warm or at room temp. (puddings will sink as they cool), topped with ice cream or whipped cream!

Friday, January 14, 2011

Toffee Blondies

Brownies were requested for the treat for FHE. Brownies seem to be the favorite request and I was ready to try something new! My little guy was up for the experiment and it ended up being a good one! These brownies are definitley NOT overly sweet, in fact adding a little caramel sauce to this treat would be oh soooo good!
They were simple and were made in an 8 x 8 pan, which meant not alot of left overs for those of us trying to eat healthier! Or maybe we are just trying to exercise more so we can eat brownies!! Whatever it may be, these turned out to be a yummy and easy treat!
Toffee Blondies
  • 1/2 cup butter, melted
  • 1 cup packed light brown sugar (or you could use a combo of both light and dark)
  • 2 large eggs
  • 1 tsp vanilla (one of the notes said she used almond extract and loves it this way now)
  • 1/4 tsp salt
  • 1 1/2 cups flour
  • 1 cup toffee bits
Preheat oven to 350. Line the bottom and sides of an 8 inch square pan with foil, leaving an overhang on 2 sides.
Cream butter and brown sugar together until smooth. Beat in eggs, vanilla and salt, scraping down the sides of the bowl.
Add the flour on low speed until combined. Stir in the toffee bits.
Spread batter into prepared pan. Bake until a toothpick inserted comes out clean, about 30-35 minutes. Let cool completely in pan.
Lift the blondies out by the foil handles. Cut and enjoy!!

Wednesday, December 15, 2010

Blackberry Cobbler

I ordered blackberries this last Saturday and spent some time searching for recipes to make things with them for fear of them going bad too quick! I shouldn't have spent soo much time doing that because I have only made this cobbler and we ate the rest! Yes we have almost eaten all 13 baskets of blackberries (I only have 2 left!)!!!
I did get this cobbler made and I thought it turned out really good! My husband thought it was a little sweet, but vanilla ice-cream seemed to help! I ate mine without the ice-cream and thought it was great!
So if you have any blackberries, try this cobbler out, I am sure it will be a hit!
Blackberry Cobbler
(All recipes.com, 4 1/2-5 star rating)
  • 1 cup butter or margarine, divided
  • 1 cup sugar
  • 1 cup water
  • 1 1/2 cups self-rising flour (or 1 1/2 cups all purpose flour plus 1/4 tsp salt and 2 1/4 tsp baking powder)
  • 1/3 cup milk, room temp
  • 2 cups fresh or frozen blackberries
  • 1/2 tsp cinnamon
  • 2 tbsp sugar

Melt 1/2 cup butter in a 10 inch round or oval baking dish. Set aside.

In a saucepan, heat sugar and water until sugar melts. Set aside

Place flour (or flour mixture) in a mixing bowl; cut in remaining butter until fine crumbs form. Add milk, stirring with a fork until dough leaves side of bowl. I kneaded dough a little in the ball to get all the flour incorporated.

Roll out to an 11x9 inch rectangle about 1/4 inch thick. Spread berries over dough; sprinkle with cinnamon. Roll up jelly roll style. Cut into 1/4 inch thick slices. Carefully lay slices in baking dish over butter. ( I read reviews and a few people simplified this part, which is what I did. I split the dough in half. Take one half and take chunks and flatten it out with your fingers until you get a thin layer and place in the butter dish. Do this until the bottom is covered of the dish. Then spread berries on top, sprinkle cinnamon on top. Next do the same as you did on the bottom to cover over the top.)

Pour sugar syrup over the top if you made a sort of pie crust, or pour around the slices if you cut up the dough with the berries.

Bake at 350 for 45 minutes. Take out and then Sprinkle the sugar on top. Bake now for 15 more minutes. Serve warm or cold and enjoy!

Tuesday, September 21, 2010

Peach Cobbler

I didn't get a picture yet (because my camera has not been returned!) but I made this last night and it was truly scrumptious!!
It had good flavor and was very easy. Next time I am planning on adding more peaches! This is a great way to use some of the peaches you have!! (IF you got some from your Bountiful Baskets last week!)
________________________
Peach Cobbler
    • 1/2 cup butter
    • 1 1/2 cup flour
    • 1 1/2 cup sugar, plus 2 tbsp.
    • 2 tsp baking powder
    • 1/2 tsp salt
    • 1 1/2 cups milk
    • 1 tsp almond extract, divided
    • 2 lbs peaches, peeled and sliced - about 4 cups (I will try 5+ cups next time)
  • Adjust oven rack to lower middle position and heat oven to 350 degrees. Put butter in a 9 x 13 pan baking pan; set in oven to melt.
  • Meanwhile, whisk flour, 1 1/2 cups sugar, baking powder, and salt in small bowl. Whisk in milk and 1/2 tsp almond extract until smooth.
  • Toss peaches with remaining 2 tbsp sugar and 1/2 tsp almond extract.
  • When butter is melted, remove pan from oven. Pour batter into pan; arrange fruit over batter. Bake until batter turns golden brown, 45-50 minutes. Serve warm or at room temp.!

Tuesday, September 7, 2010

Congo Bars

Another yummy treat we made this Labor Day weekend!
____________________

Congo Bars

  • 2 3/4 cups flour
  • 2 1/2 tsp baking powder
  • 1/2 tsp salt
  • 2/3 cup softened butter
  • 2 cups brown sugar
  • 3 eggs
  • 1 tsp vanilla
  • 12 oz pkg chocolate chips, or whatever combo you feel like! (we used white chocolate, peanut butter, chocolate and toffee chips!)
  • 1 cup chopped pecans (optional) - we added these and the kids didn't even know they were there!

YOU MUST MIX BY HAND!!!

Sift flour, baking powder and salt into a bowl (we didn't sift). Set aside.

Stir brown sugar into softened (not melted) butter into another large bowl until butter disappears. You can use the back of the spoon to help incorporate the 2 together.

Add eggs one at a time to butter mixture and stir well after each egg.

Add vanilla, chocolate chips and nuts. Mix well.

Add dry flour mixture and stir well until combined.

Coat a 9 x 13 pan with spray and spread batter evenly into dish. Bake at 350 for 30 minutes or until top is golden brown. Make sure you don't overbake. Start checking at about 28 minutes and add time as needed!

Saturday, July 10, 2010

Easy White Cake/Cupcakes

This is probably one of the yummiest white cake recipes I have found. I saw this on ourbestbites.com. They turned out super moist and had great flavor.
I made these in May (just getting around to post) and then again for the 4th of July. We layered the batter in red, white and blue!

Easy White Cake (our best bites)
  • 1 box white cake mix(or yellow)
  • 1 cup flour
  • 1 cup sugar
  • 3/4 tsp salt
  • 4 egg whites
  • 1 1/3 cups water
  • 2 tbsp oil
  • 1 cup sour cream
  • 1 tsp vanilla extract (use clear vanilla if you want a pure white cake)
  • 1 tsp almond extract

Mix all dry ingredients with a whisk, then add wet ingredients. Beat for 2 minutes until fluffy.

For cake: Pour into greased, floured pans (fills two 8 or 9" rounds) and bake according to cake pkg. directions.

(Tip: When cakes come out, cool for 5 minutes on wire rack, then cover with 2 sheets of plastic wrap ( in a + sign), turn them out and wrap the plastic around them. Allow to cool all wrapped up (keeps the moisture from evaporating out) then pop into the freezer on a cutting board to keep them flat. Once they are frozen, they are super easy to frost and defrost in about 30 minutes.)

For cupcakes: Fill paperliners about 3/4 full and bake according to pkg. directions. Makes 36 cupcakes.

Saturday, April 17, 2010

Carmel Krispies

I was given this recipe a while ago, I think from Sharon. I haven't ever tried and decided to do it today! They are really good, but makes a slightly lower fat snack a lot fattier! But I will say they are super good! Next time I think I will half the carmel recipe and just put a little on top!
Carmel Krispies

Make Rice Krispy treats as normal

Carmel

  • 1 cup butter or margarine
  • 1 cup brown sugar
  • 1 cup sweetened condensed milk (1/2 can or make your own from the powdered milk recipe)
  • 4 tbsp corn syrup

Cook, stirring constantly over medium heat, boil for 3 minutes and pour over the top of the Krispies. ENJOY!!